Exporting Orthos from iDar
Tutorial: Extract a high-resolution orthoimage from a 3D Model
So you have created some scans with your iPhone, but now what?
In this tutorial I show you how to export a 2D orthographic view of a 3D model produced using the built in iOS laser scanner and the freely available software program, Blender. This is a common need if you’re using an iOS device to scan paleoseismic excavations. The goal is to convert the scanned 3D trench exposure into a 2D figure that can be annotated for use in a paper. This is surprisingly non-trivial, but it is not a common requirement in the 3D design world, which is more oriented towards AR/VR, gaming, or CAD than for this niche need.
- In your 3D scanner app, clean up your model, deleting unnecessary areas.
- Export as OBJ file, and transfer file to your computer (easiest via google drive or similar).
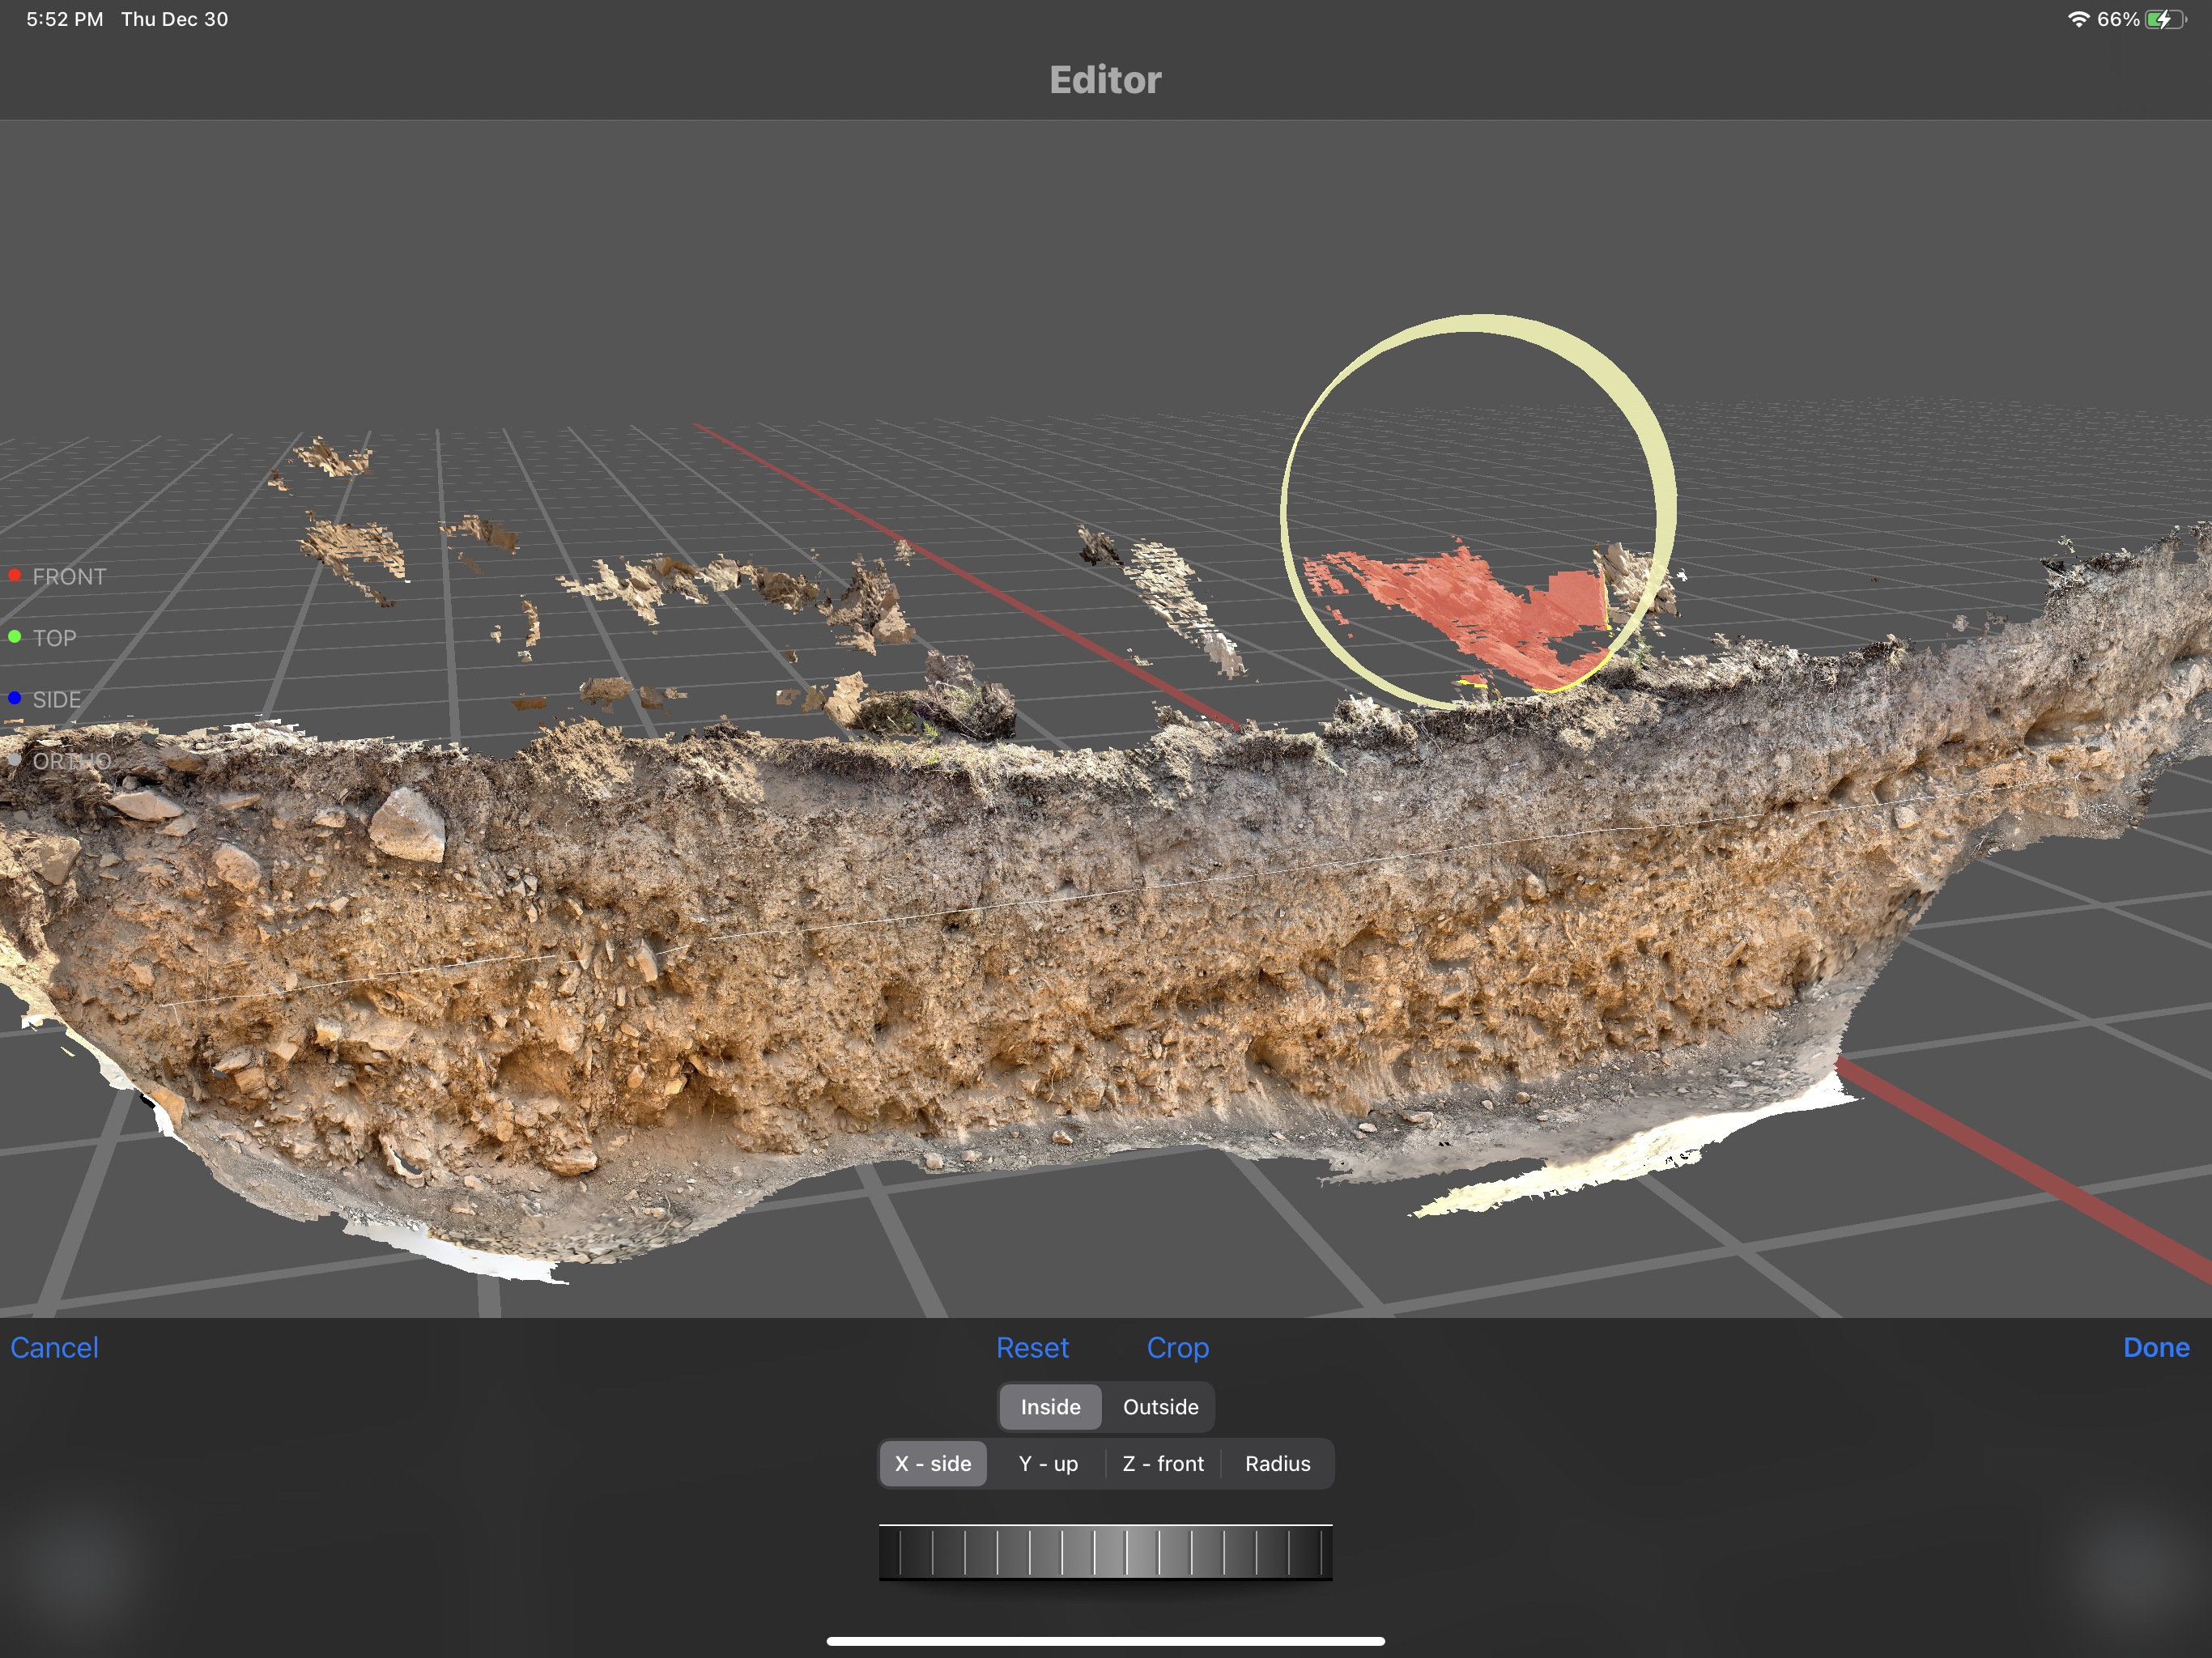
Editing your model in the 3DScanner App
- Blender is a free software for 3D design. Import model into Blender (File, import). Don’t worry that it isn’t displaying the texture. Select Viewport Shading in the top right of the viewing window (sphere icon below 'Options' button) to show the texture.
- Under view, select orthographic. Position your view such that you are looking dead on at the trench exposure. Now select the camera (under scene collection, upper right) and push ctrl + alt + NumPad0 to snap the camera to your current view. Then click the movie camera menu icon (object properties) and change type to orthographic. Adjust the bounding box to cover the trench.
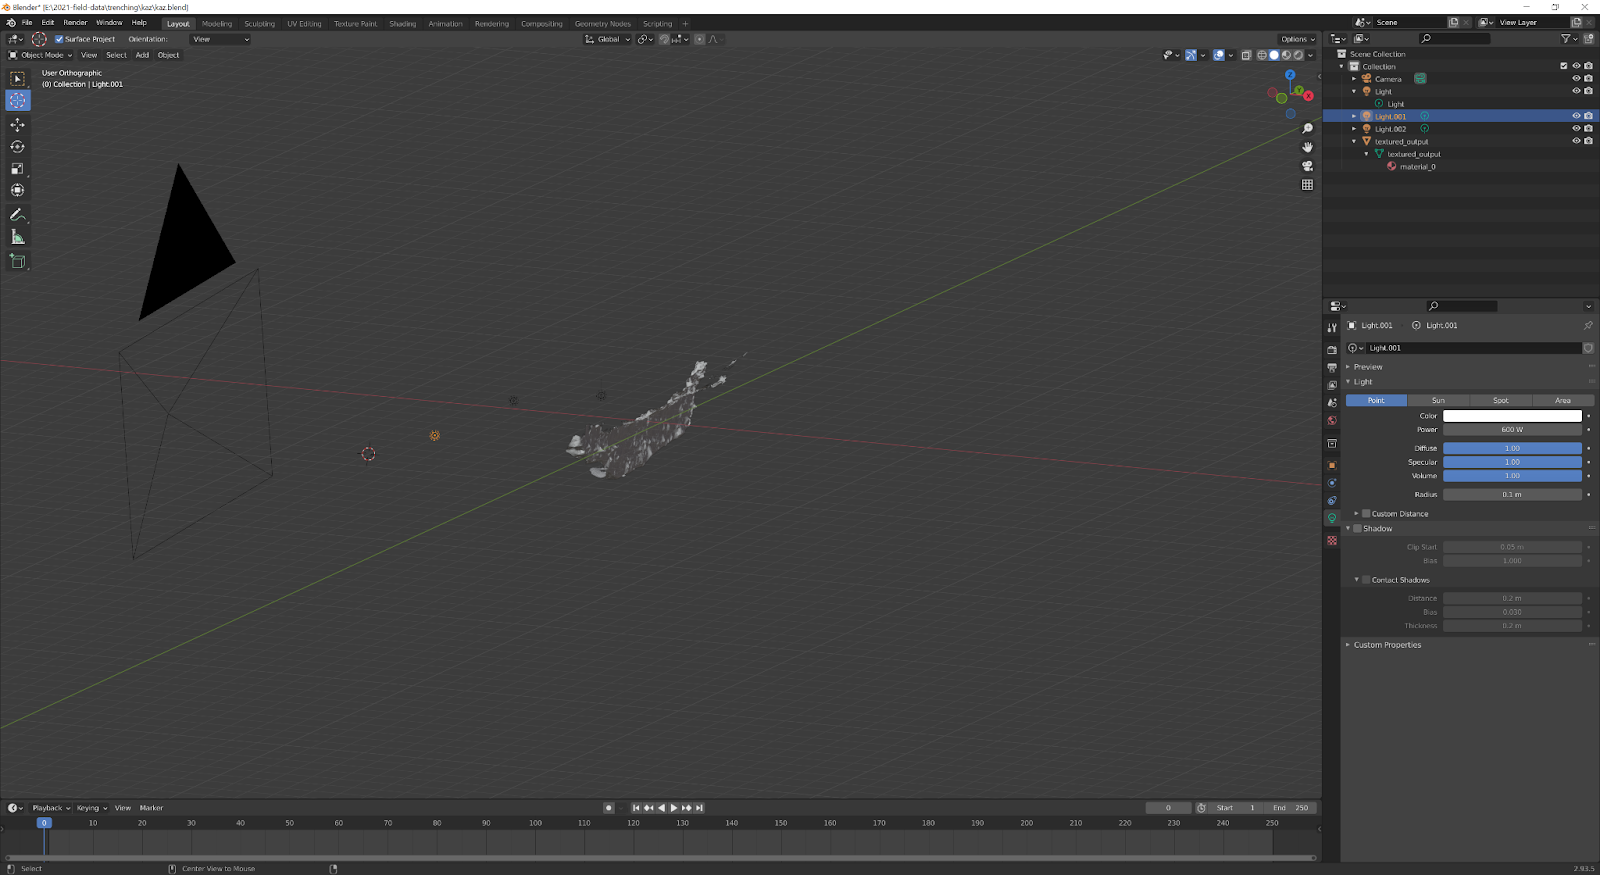
Setting up your scene. Here I am using 3 light objects to create even lighting across the model.
- Select the light in the collection. Click to set the cursor in front of the trench. Now right click and snap selection to cursor. Push F12 to preview the render of the trench. Move the lights towards or away from the trench as needed to adjust. You can copy & paste additional lights and adjust the intensity as desired.
- Under render properties (the icon that looks like the back of an SLR camera) on the right side, increase the resolution. I've found 12,000x4000 or 8000x3000 is adequate for the small trenches I've rendered, but if you have a bigger project you will need a higher final resolution.
- Finally, push F12 to render your image, and then click image, then save as, and save your image in the location of choice.
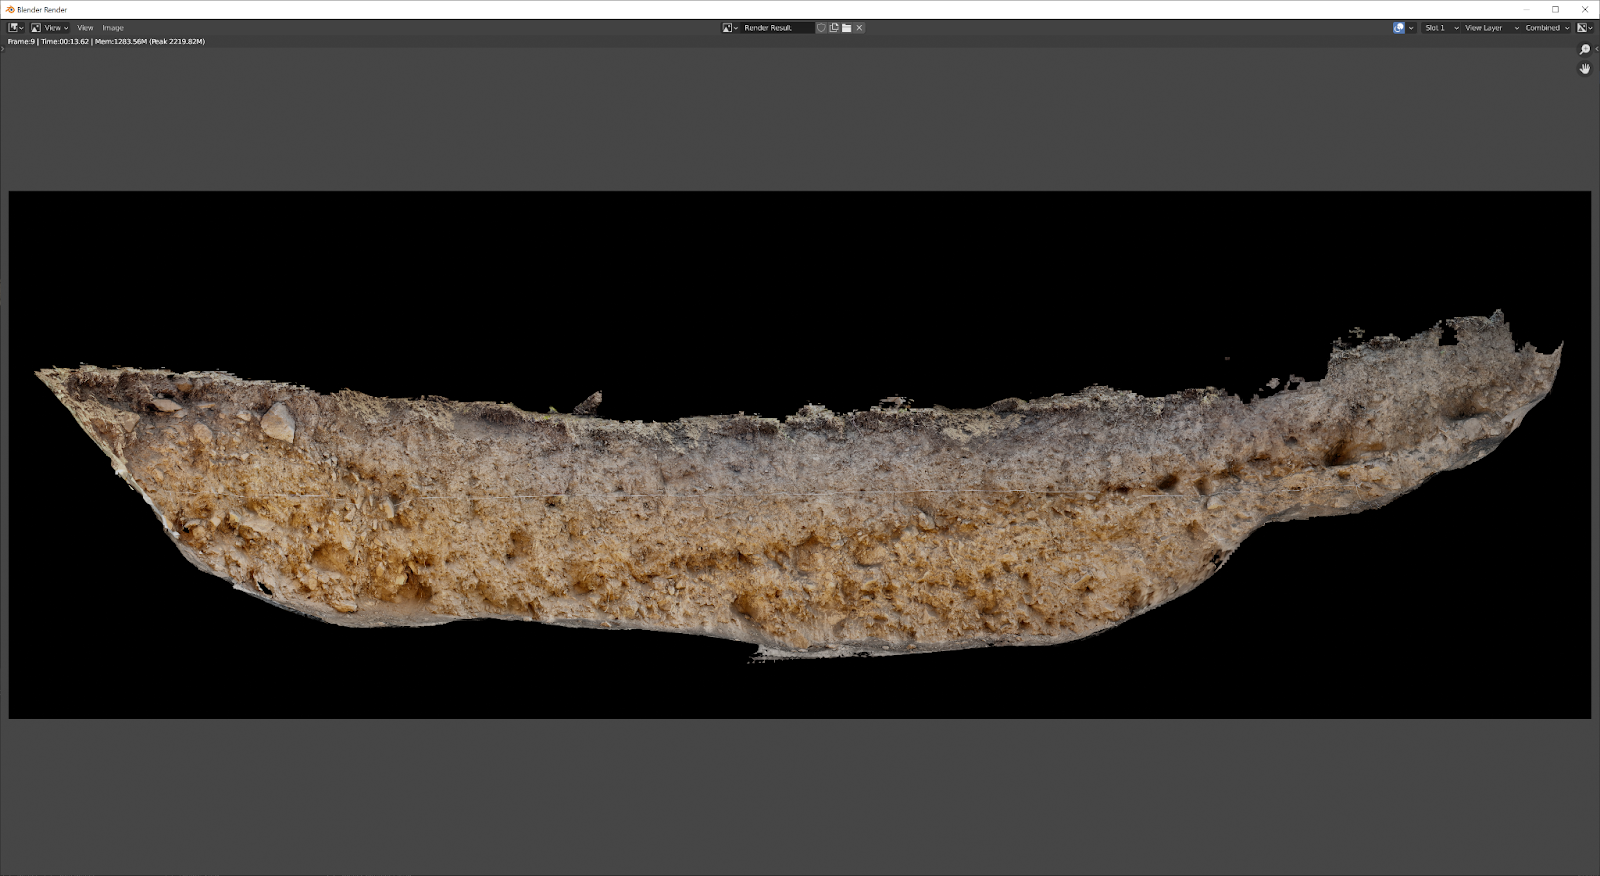
Final rendered orthoimage product can be exported to your favorite 2D drawing program.